Home | Fish Health

Category Archives: Fish Health

Feed Subscription

Dip Treatments For Fish And Corals

We all know that washing our hands and bodies helps control germs and diseases but what about in our aquariums? Fish and corals may not have hands to wash but we still have a similar option: Dips and Baths. We use these to remove parasites and pests or treat for some conditions and infections. A “dip” – whether it is for fish or corals – involves removing the organism from the aquarium and placing it in a separate container with the dip solution for a short period of time before putting it back into the tank. Similarly, a milder treatment known as a “bath” uses a weaker solution for a longer period of time. 


The type of dip or bath that is right for you depends on what you are treating. In this article, we are going to cover the most common dips: Freshwater dips for saltwater fish, dipping corals using Iodine or a commercial coral dip. For information on using dips to remove pests from freshwater aquarium plants, see our article Dipping Plants To Eliminate Snails for the different options available.


Freshwater Dips For Saltwater Fish 


Putting a saltwater fish into freshwater may seem like a risky move – and it is if done incorrectly – but when done properly, it can be useful in removing parasites like Flukes and some Protozoans. The keys here are preparation, timing and observation. It isn’t as easy as dropping your clownfish into your goldfish tank! You can use this method for new arrivals before adding them to your tank or to treat fish from a display or quarantine tank.

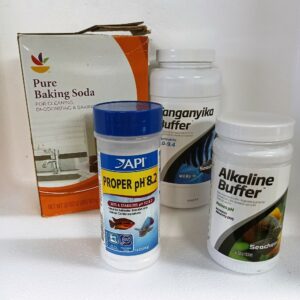
1. Prepare your dip container and water. The container should be clean and free from any detergents or waste and large enough for your fish to swim comfortably. Use clean, dechlorinated freshwater that is the same pH and temperature as your aquarium….this is key! You may need to use a buffer like baking soda or high range buffers for African cichlid tanks to raise the pH to match your aquarium, but make sure it is as close as possible. Adding your saltwater fish to freshwater with a much lower pH (for example, a neutral 7.0 when your aquarium pH is 8.4) is very stressful.

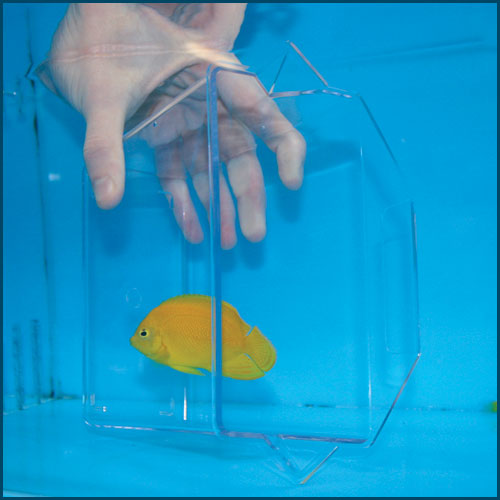
2. Once your water is prepared, carefully move the fish from the aquarium into your dip container. If you are using a net, be especially careful around any fish with spines that may get caught or damaged.

3. Continue to observe your fish in the dip. If you see (or suspect) parasites like Flukes, you can use an eyedropper or turkey baster to gently blast water onto your fish to help knock off any parasites.

4. If you notice any strong signs of stress, remove the fish from the dip and get it back into saltwater right away. Otherwise, a minimum of 5 minutes will help remove most parasites, and most fish can typically tolerate a dip up to about 10 minutes.

5. The dip water can be reused for several dips if you have multiple fish to treat, but dispose of the water after you are finished and rinse your container for next time. 


Dipping Corals


Dipping corals can help remove pests and parasites as well as treat a number of infections and conditions. Many brands of coral dip solutions are available on the market and typically use ingredients like botanical oils to kill or dislodge pests from corals. Iodine can also be used in some situations, especially when treating new frags or damaged colonies with tissue that can be vulnerable to infection. When choosing a dip, be sure to read the instructions as some dips can’t be used on some types of corals and concentrations or timing can vary from brand to brand. The instructions here are a basic guideline for most corals and dips.

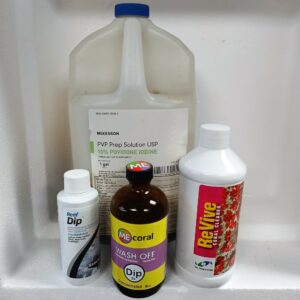
1. Prepare the containers for your dips. These dips should always be done in a separate container but can usually be done with either water from the tank (if you can safely remove enough for the dip) or with freshly prepared saltwater. The container should be big enough to completely cover the corals being dipped but doesn’t need to be larger than necessary to avoid wasting your dip to reach the proper concentration.

  • Depending on the dip and concentration you are using or the corals you are dipping, you may want to prepare a second container to “rinse” your corals after the dip. This should be about the same size and amount of water and can also be either tank water or fresh saltwater.

2. Add your dip solution to the water before adding the coral. This makes it easier to mix the solution throughout the dip container without dumping it directly onto the coral. Most dips have recommended concentrations like 1 teaspoon per gallon of water but can usually be adjusted depending on the coral; use a weaker solution for more sensitive or stressed corals or stronger solution for resistant pests or very hardy corals.

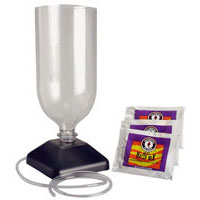
  • For Iodine dips, you can use the color to determine the strength. On a white background, a weak Iodine solution should be about the pale tan of a manila envelope. A strong Iodine dip would be a rusty red-brown but the corals should still be visible. Avoid a concentration so strong that you can’t see through it.

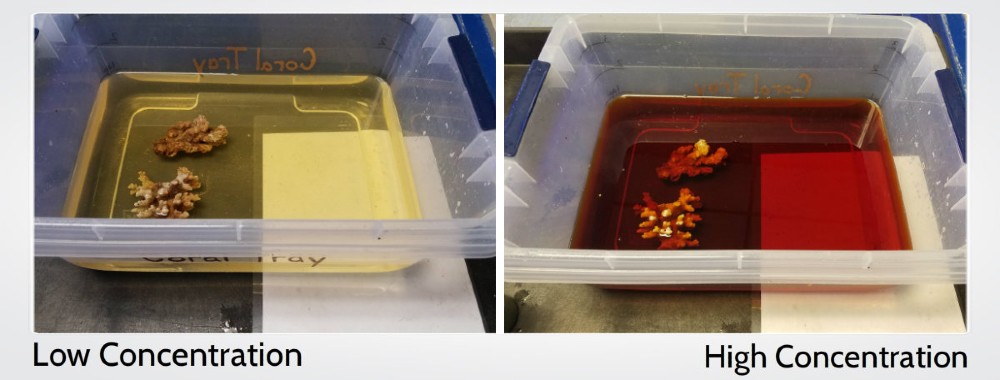
Iodine Dip Concentrations

3. Add the coral to the dip and follow the instructions on your dip. Most corals can be dipped for 5-10 minutes but if the coral appears very stressed or starts releasing a lot of slime, remove it from the dip. Hardy corals like polyps or milder solutions may be dipped for longer.

4. After the dip, rinse your coral in the dip by gently “swishing” it around underwater. If you prepared a rinse container, you can do the same in this container as well. This is especially useful after strong Iodine dips or with especially mucus-y corals.

5. Replace your corals back into the tank and dispose of your dip and rinse containers….don’t add this water back into your tank! 


When done properly, these dip methods can help keep your tank parasite- and pest-free without the need to medicate the entire tank, or to supplement a medication regime. Feel free to contact us if you aren’t sure if a dip is right for you!


Keeping Tropical Fish in Outside Ponds for the Summer

Eureka red kept in pond Hey there!  This week I wanted to talk about something a little different than my usual cichlid blog. I wanted to share some tips on how you can develop spectacular color on tropical fish in a way you may have never considered.

A few years ago, we moved into a house that had a small pond in the front yard. It was one of those rigid, preformed round ponds about 15 inches deep with a  50 to 80 gallon capacity. We kept a few goldfish in there the first year. They grew and made it through the winter just fine as we expected.

The following Spring, I got hold of some Astatotilapia aneocolor from Lake Victoria, 2 males 3 females to be exact. I was told by the previous keeper that they were aggressive, so I put them in a 55 gallon. I figured that would be plenty of space, since they were only 2.5 inch fish, and that they would leave each other alone for the time being.

Boy, was I wrong. One of the males showed his dominance within 2 hours of being added to the tank, and no matter what I did he couldn’t be swayed. I moved decorations around, gave him a time out for a week in a net breeder, and  I even put him into an aquarium with four 3 inch Black Belt Cichlids hoping he would be intimidated into submission. He went nuts in that tank, too, and started beating up the Black Belts, so back into the original tank he went. He quickly went back to his old ways, dominating and terrorizing the other male. He finally ripped out male no. 2’s right eye.

The Great Outdoors

I wasn’t sure what I could do for him. Then it occurred to me that I did have another place for him to go. The temps were high enough outside, so why not? I decided to relocate One Eye to the pond outside to give him a chance to recover. I watched to make sure that the other fish (goldfish) didn’t bother him and they didn’t. In fact, by the end of the week ol’ One Eye was the sole proprietor of the pond.

For the next few weeks, he ate well and still came up to the surface to see who was around the pond when I went to feed. I only had a little internal filter system on the pond, and soon the water started turning green. Before long I could barely see One Eye to see his condition, but i knew he was still alive and growing, possibly even larger than the bully inside. He was eating well, besides my offerings he ate insects that fell into the pond, and I also noticed he was scraping algae off the sides.

Meanwhile the dominant male in the 55 was attaining his astounding breeding colors. He was red on top half of his body and yellow on the bottom half with black fins.

The nights started to get into the mid 60’s, so it was time to bring in ol’ One Eye. When I netted him out I was shocked to see that he was an inch and a half larger than my dominant male and his colors were unbelievable! He had a deep maroon upper half and the bottom half was gold…I kid you not. I mean it was so vibrant that I couldn’t help but wonder what would happen to other fish from my collection if they had the same conditions. The following Spring, I upgraded the filter setup to an internal mag drive pump pushing into a Fluval 403 canister filter with the return line feeding a waterfall. I started keeping Albino Eureka Red Peacocks outside in that pond after the upgrade. You can see the results in my photo (top photo, sorry it’s a little blurry).

There is no match for the magic of natural sunlight and the varied diet tropicals can get outside. A friend of mine kept Red Terrors outside, where they bred for him through the season. Summer vacation outside isn’t just for cichlids, it can also be done with platies, swordtails, guppies and pretty much anything tropical if you have a place for them. Even small patio ponds could be populated with livebearers or tetras. Imagine a school of Cardinal Tetras soaking up those sun rays! Any pond will do as long as it doesn’t get too hot or too cold, and as long the fish have a little cover to protect them from would be predators like herons.

It’s a Jungle Out There

While the benefits are great, there are also some cautions to consider. This time I’d like to talk about some of the dangers and pests that may wreak havoc on our poor little fishies.

I was lucky not to have my pond visited by pests, but local stray cats, opossums, raccoons, snakes or predatory birds that may decide to visit your pond at any time.  Even bugs like dragonfly nymphs can prey on young and small fish. Ample water movement and surface ripples are usually enough to deter them, but more effort may be needed to deter larger predators. There are some easy ways that you can help to protect your fish while they enjoy their outdoor summer vacation. Personally, I would recommend the live plants. You can use floating foliage like water lilies, duck weed or hyacinths for cover and protection for your fish. Young fish will also hide in the roots and feed on the small bugs that live in the roots. Another solution is the use of pond netting. The netting can prevent many predators from snatching your fish out of the water. Not very aesthetic, but effective.

Pesticides and other contaminants may pose a hazard in an outdoor environment. Toxins can be washed into a pond during heavy downpours or may be blown into the Green Heronwater.  The rish is small as long as you stay aware when applying such products…something to keep in mind. Even the rain itself can be a danger to your fish. Acidic rain can drive your ph to low levels if you have a low kh. Depending on the species you’re keeping, such fluctuations can wipe fish out quickly.  I was able to keep the kh high and the ph stable with weekly buffered water changes so thi swas never a problem in my experiences.

Closing Time

Cool temps are the other concern. It’s important to know when to bring them in. For me, when night temperatures start dipping below 75 F, I know it’s time to bring them back to the tank. You may notice the fish becoming lethargic, and some may even die if you don’t pay close attention at the end of summer. I recommend acclimating them slowly back to indoor temperatures. If the filter running the pond is a canister filter, I would recommend keeping it running on the main tank. Clean it out before bringing it inside, but you’ll be supplying an established filter/biological for your indoor tank, and you don’t have to wait for the whole cycling process. We drain the pond each year and look for babies. You can then either store it till the following year or couple of set it back up in the house for the winter.

I hope this inspires someone else to try some tropicals outside. You wont regret it. Let me know if you have any questions, I’ll be happy to help you out.

Until next time,

Jose

Aquatic Science Fair Projects for Aquarium Lovers

With the new school year getting underway, it’ll only be a matter of time before the first science fairs and lab experiments start up. We get lots of students visiting or contacting us in search of ideas and test subjects for project ranging from the simple to the complex so I thought I’d share some tips and some of our favorite ideas for easy (and affordable) aquatic science fair projects for students of all levels.

chalkpieces

Before you begin…

Before you start any experiment or project involving live plants or animals, it is important to make sure you are prepared for the maintenance, care and cost of the experiment and livestock they are taking on. We’ve had many students that have a great idea for a project involving crabs, jellyfish, “Nemo” clownfish or other animals but don’t realize how much work and supplies are going to be needed to keep these animals healthy. They are also a commitment after the experiment is done; fish aren’t disposable and you have to be ready for them to go from Test Subject to Pet at the end of the project. Some experiments also require multiple subject that each need their own setup and supplies.


Time is another important factor to consider with these projects. Many experiments involving fish and plants are going to take some time before you will really start to see results like growth or changes to color or behavior. It can take at least a few weeks to reach any conclusions so if this is a last-minute project, you might be better off heading in another direction.

stockxpertcom_id3114171_size2
What do you want to know?

The hypothesis of an experiment is the question you are trying to answer or what you are trying to prove or study. Depending on your grade level, this might be observing an environment or behavior or it might be testing a number of variables against a control. If one of the ideas here intrigues you but you aren’t sure where to go with it, ask your teacher or let us know and we might be able to help point you in a direction.


The project ideas here are mainly freshwater. Saltwater science fair projects are definitely possible, but they are going to be more difficult and expensive. Saltwater aquariums have a lot more factors than freshwater and need more equipment and maintenance to keep them healthy. If you already have a saltwater aquarium, you may be able to adapt one of these ideas to it or come up with your own but it may be easier to stick with a freshwater experiment if you don’t already have some saltwater experience.

Some Aquatic Science Project Ideas

Bettas and Aquatic Science Fair Projects

A male Veiltail Betta

The Betta (“Siamese Fighting Fish”) as a test subject

  • Betta splendens, also known as the Siamese Fighting Fish, is a good fish to use in aquatic studies and projects. They don’t need a lot of equipment or space, are easy to care for and are fairly inexpensive. They can be found in a lot of different colors and varieties but the most common kind that you will find in most stores is the Veiltail Betta. Some project ideas would be keeping bettas in a few different environments like a brightly lit versus darkened room, under a colored light like blue (“actinic”) light versus a white light, or warmer versus cooler temperatures. How do those changes affect each fish’s growth or coloration? You can take a picture every few days to compare any changes in their color or fins. Does the type of food or the color of the ornaments and backgrounds compared to the fish’s own color make any difference? Try different types or brands of food (flakes, pellets, frozen food, live food, freeze-dried food) to see how each affects the fish’s health.
  • A good way to measure growth is to weigh a specific amount of water in a container without the fish, then weigh the same container with the fish. The difference between the two weights will tell you about how much the fish itself weighs and changes in that weight will tell you if the fish has gained or lost weight.


Fish Food Nutritional Comparison

Aquatic Science Fair Projects and Fish Food Nutrition

Color-enhancing flake food like this is a common aquarium food.


  • Anyone who has gone shopping for food for their aquarium knows how many choices there are for your fish. Flakes, pellets, frozen, freeze-dried, live, color-enhancing, vitamin-enhanced…the choices can be overwhelming. At the time that I write this, we have over 400 different fish food items on our website alone! For a science fair project, you can compare several of these foods and see how your fish react; feed the same kind of fish in separate but identical environments the same amount of different types or brands of food at the same time of day and measure how this impacts their growth, health and behavior. Maybe one kind of food is advertised as color-enhancing or another has a different primary ingredient…does one kind give the fish brighter colors or make them grow more during the time frame of the experiment? The fish should all be in separate aquariums to make sure they are only eating “their” food but you can otherwise use any fish – goldfish, bettas, livebearers like mollies or guppies. You can use the same method as above to record their growth.


The Nitrogen Cycle and Aquatic Science Fair Projects

The Nitrogen Cycle

The Nitrogen Cycle and “Cycling” a New Aquarium

  • The Nitrogen Cycle is a process that every aquarium and contained body of water will go through as the helpful bacteria populations that take care of fish waste will go through. Every aquarist has seen this happen whether they realize it or not. As the first living critters in a tank produce waste or leftover food or other material decomposes in the tank, a bacteria known as Nitrosomonas change that waste from ammonia (NH3) to nitrite (NO2). Another population known as Nitrobacter will change that Nitrite into Nitrate (NO3), the end product of the cycle which is usually removed by water changes or plants that use it to grow like fertilizer. If the levels of Ammonia, Nitrite and Nitrate could be put on a graph throughout the process, they should look like three hills with their peaks coming one after another. Can you set up and “cycle” a new aquarium and use test kits to record these values at a specific interval (every 5 hours, for example) and see if you can recreate this cycle? Does the number of fish change the levels or speed throughout this cycle? What about if the tank is cycled with a dead “waste” like leftover food instead of live fish?
  • A project like this does use chemical test kits. The kits available from pet stores for aquariums are easy to use, but adult supervision should always be used around chemicals like these.


Fish Tricks

  • Did you know fish can learn? Fish like goldfish have been “trained” to recognize objects and do all sorts of tricks like swimming through hoops or under limbo bars. There have even been “soccer matches” between saltwater fish to celebrate the World Cup. Training fish, like most animals, is all about positive reinforcement. Some companies have even made training kits just for teaching fish. Some experiments have trained fish to recognize certain colors by putting food in cups of one color (like red) but not others (like blue and yellow). Once the fish begins to associate the red cup with food, does putting a red ornament in the tank or red background on part of the tank make them choose that over the blue or yellow? How long does it take, and does any kind of fish learn faster than others? You can try putting one fish through its paces or train a few fish to compare their learning styles.
  • Check out this video from Rochester Institute of Technology’s Professor Caroline DeLong to see how she taught a goldfish to recognize shapes


Hatching Brine Shrimp and Aquatic Science Fair Project Ideas

Brine Shrimp Hatchery Kit

Hatching Brine Shrimp

  • Brine Shrimp are popular as fish food in aquariums as well as in the wild, and there was a time that “Sea Monkeys” were popular as “pets”. Hatching brine shrimp can be an interesting endeavor. They can be easy to grow but need just the right salinity (salt level) and the newly-hatched shrimp will need equally tiny food. The baby brine shrimp also show a behavior known as “phototaxis”, meaning they are attracted to light. Brine shrimp eggs are inexpensive and can be purchased in their dry “cyst” form where they will hatch once back in the right water. Experiment with salt levels, food like phytoplankton and with light and see what factors make for the best hatches. Once the shrimp are hatched, they can grow to almost a half inch in length and make great fish food!


This is just a sampling of some concepts that aquarists face every day and there are a lot more out there like overfeeding, breeding and genetics in fish like guppies or mollies, water changes and water chemistry…the possibilities are endless! Popular aquarium fish are even ending up in important medical research. Have we given you any ideas for your next science fair project or laboratory experiment? What would you like to learn more about, and what are some of your favorite projects? Share your results and experiences with us…we’d love to see the results of your studies!

Live Feeders: Gut Loading for Aquarium Predators

Live foods are popular for larger predatory fish and even some inverts, and some new or finicky animals may not eat anything else. Unfortunately, they aren’t always the most nutritious in an aquarium setting. It is much easier to get a larger variety out of frozen or prepared foods or enhance them with additives, so how can you make the most out of live foods if it is your only option?

seahorse_orange

Picky fish like seahorses can be tricky to feed

You are what you eat”…and so are your fish

The problem with feeding most live foods is a lack of variety or nutritional content. Common live feeders like ghost shrimp or guppies just don’t have a lot to them and feeders aren’t usually raised or bred with as much care as animals intended to be ornamental. Much of the most nutritious foods in nature are also some of the smallest – microfauna like copepods and the bright red Cyclops, for example – but these critters are far too small for something like the finicky frogfish or lionfish or sharks that may need live foods and they just aren’t practical to raise.

So, instead of feeding that tiny food to the bigger predators, feed it to the food! This method is known as “gut loading” and is commonly used when feeding crickets to reptiles or amphibians but has a lot of practical use for aquarium hobbyists as well. The principle of gut loading is to feed nutritious food to the live feeder, then feeding that live feeder to its predator while the nutrients are in its system. This is making a process known as bioaccumulation work for us instead of against us like we see in effects like the ciguatera poisoning we discussed in the past.

For example, many planktonic foods are very nutritious but too small for a fish like a frogfish. Frogfish will often hunt down and eat ghost shrimp which are very common (but not especially nutritious) feeder shrimp. So, if we feed the plankton to the ghost shrimp, then feed the ghost shrimp to the frogfish, the frogfish eats the plankton.

Gut Loading:  How to pack it in

p53494

Specimen containers make ideal holding areas for gut loading

With a name like “gut loading”, images of stuffing a guppy like a Thanksgiving Day turkey may come to mind but in reality, its much easier. Just feed the live feeder before it becomes food. For smaller feeders like guppies, ghost shrimp, or even crickets or mealworms, it is usually easiest to put the feeder in a smaller separate container from wherever it is being housed. In our store, we will put ghost shrimp in one of the small specimen containers we use in catching your fish. This keeps the system where the rest of the feeders are being kept cleaner and concentrates the nutritious foods you are using for the gut loading to where the feeders are sure to find it. Then, let the feeders feed. For transparent feeders like ghost shrimp, it is easy to see when their guts are full of the food you are using. For others, monitor how much they are eating. Usually anywhere from 15 to 45 minutes is plenty of time; after all, we don’t need the feeder to digest the food, just get it into their guts. Once they’ve eaten their fill, off to become a meal they go!

p53357

Cyclops are tiny, nutritious crustaceans perfect for gut loading

Depending on the predator you are trying to feed in the end, you can gut load with zooplankton like Cyclop-eeze, phytoplankton like Spirulina, nutritional supplements like garlic or vitamins or even some medications (best with the fish only and not inverts). The foods you are using for the gut loading can be fresh, frozen, freeze-dried, flakes or in a liquid suspension. Experiment and see what works best for your predators or give them a nutritious snack as a treat!

Understanding the Active Ingredients in Multi-Purpose Aquarium Medications

Sick fishIn the first two parts of this series, we discussed anti-bacterial and anti-parasitic ingredients but there are multi-purpose aquarium medications that are available to aquarists treat more than one symptom. Also, we often see more than one type of infection at a time as one can lead to another. Parasites may lead to bacterial infections at the wound site, and secondary fungal infections may occur as a result of a bacterial infection. These ingredients listed here may be effective for more than one type of disease or outbreak.

Acriflavine:

Acriflavine is used as an active ingredient to treat a number of conditions. It is an antiseptic that has been shown to be successful in treating fungal infections on fish as well as to treat some bacterial and parasitic infections. It can be used against two of the most resistant infections in the aquarium hobby: Oodinium (parasitic) and Columnaris (bacterial). Acriflavine is generally used for infections based in the slime coat and skin of the fish, not for “larger” parasites like Ich or worms.

Formaldehyde/ Formalin:

Formaldehyde is well-known as a preservative, especially for scientific specimens, but it is also used in medications and diluted solution of formaldehyde gas are found under the name Formalin. Formalin by definition is usually about 37% formaldehyde. Formaldehyde and Formaline are both used to treat fungal infections and some parasites – including the notorious Ich – but can be dangerous, especially to invertebrates (after all, parasites are invertebrates). Most formaldehyde-based medications work better as a bath or dip instead of being used to treat the entire system, and any of these medications should never be used with invertebrates that you want to keep alive. Formalin also depletes the oxygen in the water very quickly, so the water must remain well-aerated, especially when the concentration is high and water movement is low, as in a dip. Some of these medications can also be used to keep fish eggs fungus-free.
Read More »