“Slime algae” is a common problem with aquarists of all levels but getting rid of it can be tricky. The name “slime algae” is a misnomer and what may looks like a slime in your tank could be a number of different problems or, more commonly, a symptom of a number of different problems. The key to getting rid of it is to identify and eliminate the cause rather than just treating the symptom.
As with most aquarium problems, diagnosing this problem starts with testing your water quality. Water tests are just like vital signs at a doctor’s office and can point to or eliminate a lot of different problems in an aquarium. In addition to the four core water tests – Ammonia,Nitrite, Nitrate, and pH – testing the Phosphate level is also important in algae and algae-like issues like this. We’ll go into more detail later with how each parameter may be causing your problem and how they can be used to solve it.
Next, take a look at the “slime” itself…we’ll use these different appearances to help narrow down which you might be seeing in your tank. What color is the algae – red, green, black, brown, white? What is the texture like – thick and mat-like, a thin coating, wispy, cloudy? Do you notice it growing anywhere particular on the tank – only on the substrate or a certain ornament, in a circulation deadspot, only towards the top? Can it be easily brushed away? Are there bubbles forming beneath it?
Now to the different “slimes”…
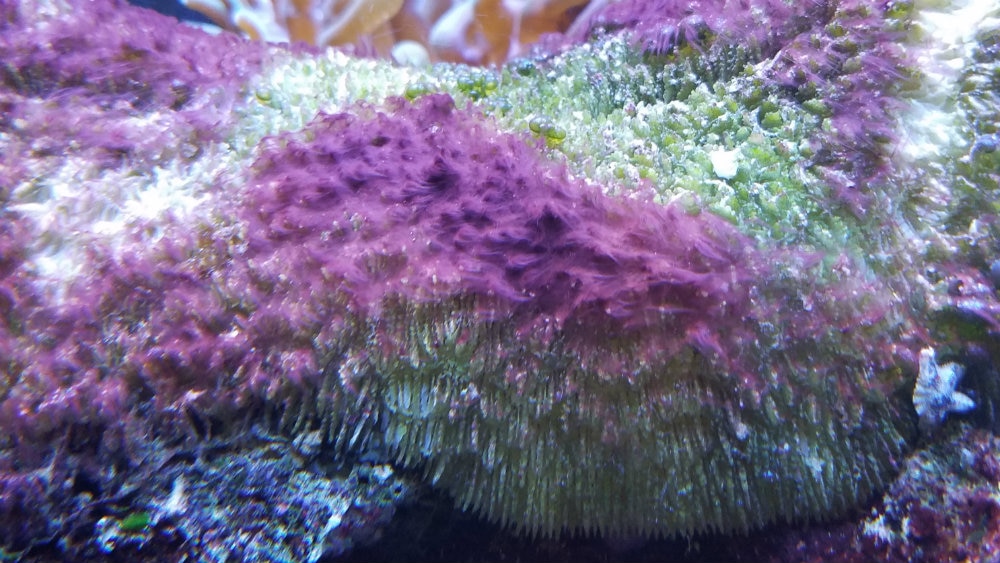
Thick and mat-like, usually dark red (especially in saltwater) or dark green (especially in freshwater). Bubbles form underneath the mats and it is easy to brush off of surfaces.
This is the most common “slime algae” that aquarists encounter but it isn’t actually an algae at all even though it may behave like one. This is Cyanobacteria (often simply called “cyano”). Cyanobacteria are bacteria that manufacture their own food and live in colonies — large enough for you to see them! It’s these colonies that cause trouble for aquarists. They are not necessarily blue-green but can be black, green, blue green, and the familiar dark red sheets covering many surfaces in an aquarium.
The first thing aquarists who find an unwanted colony of cyanobacteria in their aquarium want to know is how to get rid of it. Well, this is where it gets tricky. To eradicate the problem, the particular trigger for the cyano bloom must be identified and treated. Not every bloom is in response to the same trigger and while throwing a chemical at the problem will perhaps clear it up temporarily, it will come back, and it will be worse. Cyano has a few common causes:
- High Nitrates (NO3-)/Dissolved Organic Carbon (DOC): These two parameters go hand-in-hand and are often interchangeable for an aquarist’s purposes. Nitrate and DOC is a food source of the bacterial side of the bacteria-algae. Sources include: fish slime, algae, bacteria, digested/uneaten food, metabolic waste, live food, some aquarium additives etc.
- Key Appearance: The cyano with this cause will grow fairly indiscriminately anywhere in the tank where it gets light. This is usually the thickest mats of cyano.
- Solution: This is best done by frequent water changes, good water movement (power heads and closed system circulation ) and (this is important!) a good protein skimmer (for saltwater tanks only). An undersized or ineffective protein skimmer, high waste loads, or a combination thereof will increase the dissolved carbon level. As a rule of thumb for skimmers; buy one that is rated for at least twice the size of your tank. It may take some adjusting but a properly functioning skimmer can remove ½ cup of thick organic scum from a tank a day. Also, watch what you feed. Feed once a day. If you wish to feed twice, simply split the amount in half – don’t feed twice as much food. If you feed grocery store bought seafood or are making your own foods, rinse all foods thoroughly as seafood sold for human consumption is treated with phosphates and preservatives to keep it fresher longer. (It’s true!) Avoid flake foods, these dissolve too fast – pellets and crisps are much better and more palatable.
- High Phosphates (PO43-): This level is similar to the Nitrates above and may come from some of the same sources. It is used as a preservative in some foods as mentioned, but is usually the result of the water source. If you are using tap water, be sure to test the water before adding it to your tank, especially if it is well water or if you are in an area with a lot of agriculture and run-off. You can also check with your municipality if you use a municipal or “city” water source since Phosphate may not be removed in all areas.
- Key Appearance: Similar to above.
- Solution: Frequent water changes with Phosphate-free water. If your water source already has high Phosphate levels before it even makes it to your tank, consider installing an RO/DI (Reverse Osmosis/Deionization) Unit . This filtering system removes all impurities (including Phosphate, Nitrate, and DOC). If you already have an RO/DI Unit, make sure all the membranes are installed correctly and changed regularly. If you aren’t able to install your own unit, many stores like ours sell RO/DI water by the gallon. Filter medias are also available to help remove Phosphates faster than water changes alone.
- Lighting:The food source for the algal side of the bacteria-algae is light. This is becoming less common as LED lighting is replacing older fluorescent aquarium lighting but if you are still using fluorescent bulbs, check on the age of your bulbs. Light bulb spectra (the “color” of the light) shift as they age, resulting more favorable conditions for photosynthesis to take place more vigorously. Older bulbs become more yellow in color and the “good” plants and algae can’t use this spectrum as well as the “bad” algae and cyano can.
- Key Appearance: If lighting is the cause, you are most likely to see the cyano forming in the most brightly-lit areas of the tank with the most direct light. Since light wave penetrate differently through the water column, you may see a gradient in the cyano growth from top to bottom.
- Solution: Replace old bulbs. If your fluorescent bulbs are older than 6-8 months, it is time to replace them. Even if they still “look” bright, the color will have started degrading. If you are able to, consider switching to an LED fixture. In addition to being much more energy efficient, they don’t age and lose their spectrum in the same way fluorescent bulbs will.
- Poor Circulation: In this case, you may see cyano in only certain areas of the tank like corners or areas sheltered by rockwork. In these areas, the circulation is blocked or can’t reach sufficiently and any waste can build up before it can be removed by the filter. This provides a captive food source for the cyano.
- Solution: Rearrange your tank or install powerheads or pumps to increase the circulation. Consider upgrading your filter as well if it isn’t powerful enough for the tank size.
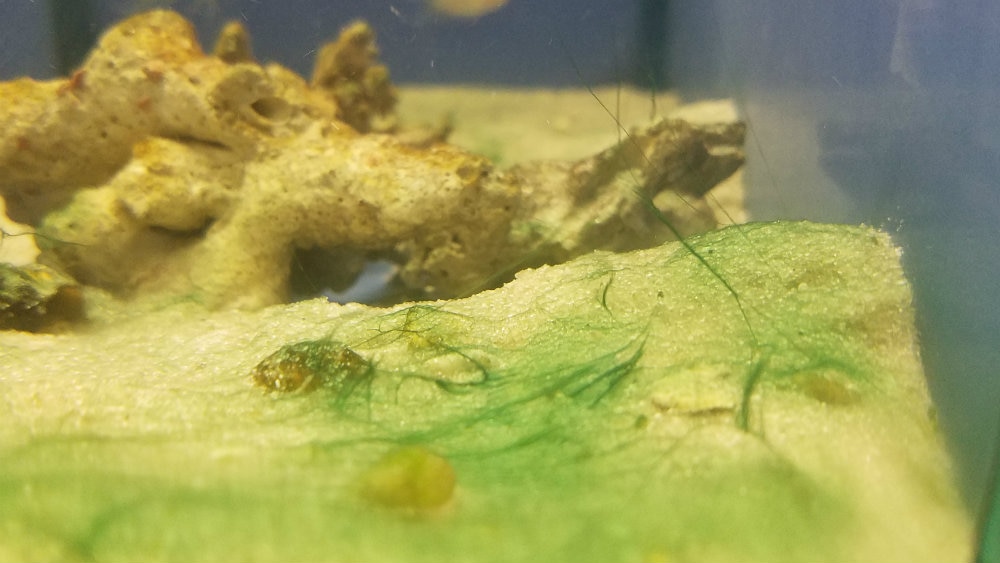
Thin and wispy sheets, usually on the substrate and especially in freshwater tanks. Usually green, brown, or blue-green
Trick question! This is also Cyano. This appearance is more common in freshwater tanks and in higher-flow environments where the Cyano can’t settle into thick mats. The same causes and solutions above still apply.
It should also be mentioned that there are chemicals to “treat” Cyano. Cyano is a gram negative (thin cell membrane) bacteria, much like most bacteria in the aquatic environment. A dose of Erythromycin will knock out the colony of slime quite quickly and this is the active ingredient in most Cyano chemicals on the market. However, since the nitrifying bacteria you need in your tank are gram negative as well, they will be affected also, either being killed or severely damaged. This treatment is more advisable in freshwater aquaria, but only with careful attention paid to water quality while treating. Like all antibiotics, if dosed frequently the cyano will develop a resistance. This should be a short-term fix only, and the problem leading to the cyano bloom in the first place still has to be addressed to eliminate it for good.
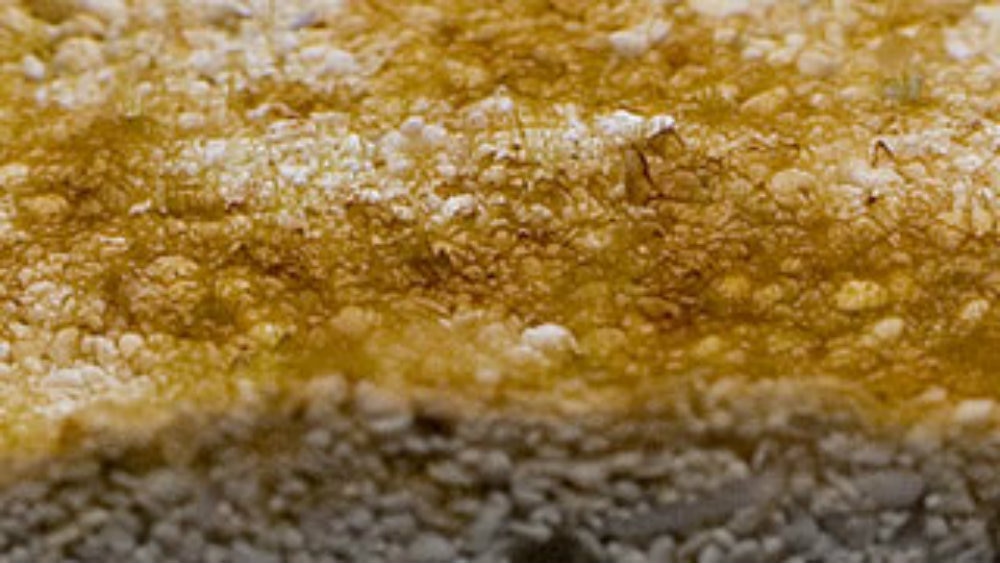
Thin light brown coating on exposed surfaces, especially in new aquariums (less than 4-6 weeks) or in tanks that have recently been “restarted” with a large water change (over 40-50%), medication, or other event
A few weeks after the tank has started cycling (after live rock, fish or a bacteria culture has been added), you may see a thin brown film covering the surfaces and sides of the tank. This film scrapes or wipes off easily and cutting back lighting doesn’t seem to affect it. No snails, hermit crabs or fish feed on it, but critters moving across the substrate or glass tend to stir it up enough so it “goes away.” So, what is going on at this point?
The “algae” you see is not a type of plant with cells like traditional green algae that most people think of. It is actually made up of diatoms, a type of phytoplankton whose cell walls are primarily made up of the mineral silicate. It blooms towards the end of the cycling process in a tank because of the imbalance of nutrients in the system but will usually die off on its own once the water chemistry in the tank stabilizes. This is what we commonly refer to as “New Tank Syndrome” (NTS).
- Solution: Just wait! As tricky as it may be, the best tool to combat NTS is patience. Once the cycle progresses and the tank becomes established, this diatom bloom will exhaust itself and fade away on its own. You can clean the sides of the tank and stir up the substrate to break up the algae, but avoid the temptation to do water changes or add any algacides at this point….this will only cause the cycle to take even longer to finish and the NTS will keep coming back. Most tanks take about 4-8 weeks to cycle, depending on the bioload and size of the tank.
- For more information, see our article Explaining the Nitrogen Cycle.
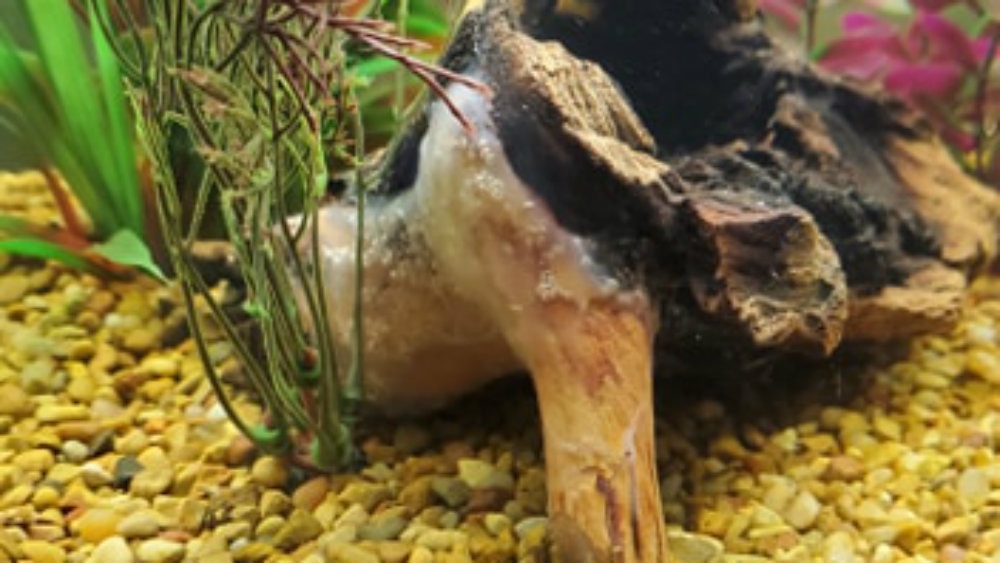
White, mold-like coating often isolated to a single ornament (especially natural ornaments like driftwood) in a freshwater tank
This is usually a sign of fungus or decomposition. If the “slime” is translucent in appearance, it is more likely to be a fungal growth. This is common on ornaments that may have been left outside and exposed to airborne spores, or on pieces washed with some detergents. If possible, remove the piece from the aquarium and scrub it thoroughly in a bucket of tank water or under warm running water. Spider Wood especially is notorious for becoming moldy when first added to a tank but will usually dissipate on its own in time.
If the “slime” is more opaque in color and easily brushes away, something is decomposing. If this is a natural material like a once-dried-out starfish or another animal, dispose of it…it will only continue to decompose and harm the water quality. If it is a harder object like a piece of wood, you can try cleaning it like described above but if it continues to soften or fall apart, it likely just isn’t a safe type of wood and should be replaced as well.
These are just a few of the most common “slime”-related issues we encounter often but are far from everything you may experience. We have come across some really unusual circumstances that have turned out to be related to something as seemingly unconnected as an oil-diffuser air freshener in an outlet near the tank. Feel free to let us know if you need help troubleshooting with your own tank!
Originally published September 9, 2008. Updated May 13, 2020.
 That Fish Blog – Aquarium Advice and Information

 Cherry Shrimp, Neocaridina heteropoda, are named for their deep red, speckled coloration. They originated from Northeast Asia and this is not their color in the wild; they have been selectively bred to enhance the reds. Their natural coloration is reddish brown to brown to help them blend to their environment. Cherry Shrimp are common, colorful, cheap, and hardy. They are an ideal beginner shrimp as they may survive in conditions that many shrimp will not tolerate.

 sets of lights on so that you can see in the section that you are working on. On a tank that is 10’ long, that you need a ladder to look into the tank, this comes in handy.
 The protein skimmer recirculates on this section, so it has a constant supply of raw surface water. Then there are a series of baffles, an open center section, another series of baffles, and then a third section where the return pump draws water from. The protein skimmer is also a custom Trigger Systems design that is matched to the sump. It is a dual Beckett injector design that is 10” in diameter, and 44” tall, it works great, lots of thick dense foam. The skimmer is run by a Sequence Marlin pump, and the system return pump is a Sequence Hammerhead.
 The Closed Loop system sits underneath the aquarium. There are four holes drilled into the bottom of the aquarium, one serves at the drain that feeds the pump, the other three are returns that circulate the return water throughout the live rock structure in the tank. The closed loop pump is another Sequence Hammerhead pump that puts out about 5,000 gph. Each return in the tank splits into four lock-line modular pipe sections with nozzles, which allowed us to direct flow wherever we want it. This is all hidden inside the rock work in the tank, it is hard to see any of it at all.
 The tank has about 1,000 pounds of live rock, that is a mixture of several types of Tonga and Fiji rock. We tried to use as many really large rocks as possible, several are 70 – 80 lbs each. The live rock was strategically placed to hide as much of the closed loop system as possible, and at the same time leave a lot of open space to give it a more natural appearance. I really wanted to avoid the wall-of-rock look that so many aquariums have.
 I will try to post some more pictures of the tank as time goes on, so that you can see the corals as they grow and fill in. This was another reason that I left so much open space in the aquarium when we did the rock work, I wanted to make sure that the corals had plenty of space to grow.
 involved with the retail fish trade since 1996, and served as Director of Freshwater Fish at top stores in Atlanta and San Diego. His interests and expertise lie in both Old World and New World Cichlids, tropical planted tanks, and marine reef aquaria. He’s been an aquatics supervisor at TFP since 2007.
 While many people look to the clown loach ( Chromobotia macracanthus) to help rid their tanks of pesky snail populations, there are several small species of Botia that are perhaps a better, smarter solution for tanks under 150 gallons. Botia striata is one of these species. While the clown loach reaches a size of nearly 40 cm (16 in.) the modest